Hello to all friends of Document Understanding,
The day you have all been waiting for is upon us! Forms AI is in public preview starting today and here is how to find it, use it, and provide feedback so we can improve it.
What is Forms AI?
Forms AI is a way to extract data from documents with a fixed layout, like forms. You label the values you are interested in on at least 1 sample, and Forms AI trains a model in seconds behind the scenes to recognize those values on other samples.
Prerequisites
Document Understanding Cloud
You need to make sure the Document Understanding service is enabled on your tenant.


Once it is enabled, you will see the Document Understanding option appear in your left navigation bar.

Automation workflow (Optional)
If you have never used UiPath Document Understanding product, please take a look at the Quick starters documentation page. For more advanced users who are ready to build scalable and robust RPA automations, please use the Document Understanding process template available in Studio 21.4 and later. A full tutorial is also described here: RPA Framework for Document Understanding.
For using Forms AI, populate the endpoint input property in Machine Learning extractor activity with the endpoint generated using Forms AI (described in detail below)
Quickstart Guide
Getting started with Forms AI is very easy. Follow the simple steps below to use Forms AI.
Before you get started, first download the sample documents that will be referenced in this guide:
Forms AI Example Docs.zip (1.0 MB)
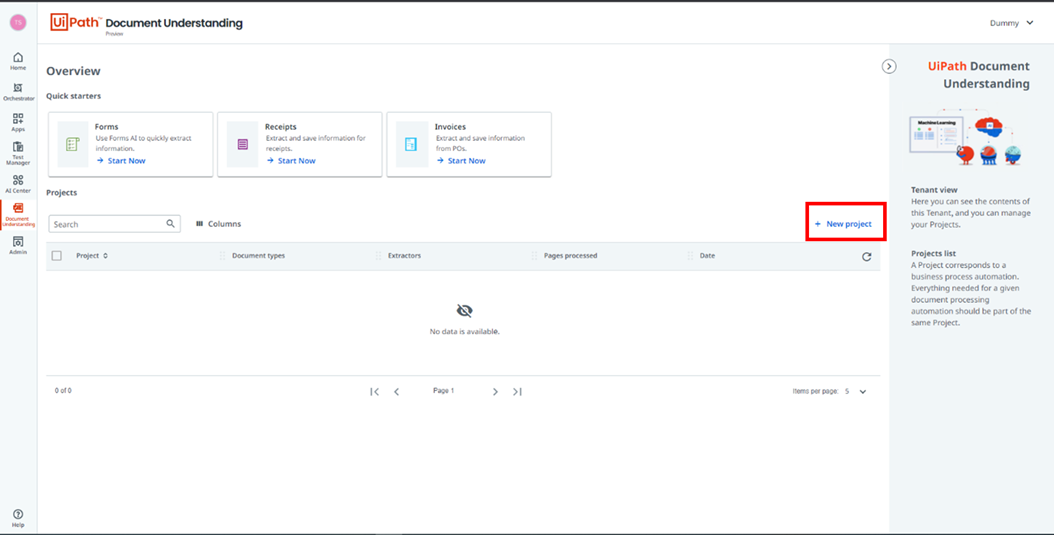
Step 1 - Click on the “Document Understanding” icon on the right-hand panel to access the
Document Understanding Cloud. If this is your first time, you will see an empty page like this:

If you have already created projects in the past, you will see a table with past projects (the remainder of this guide will use such a set-up)
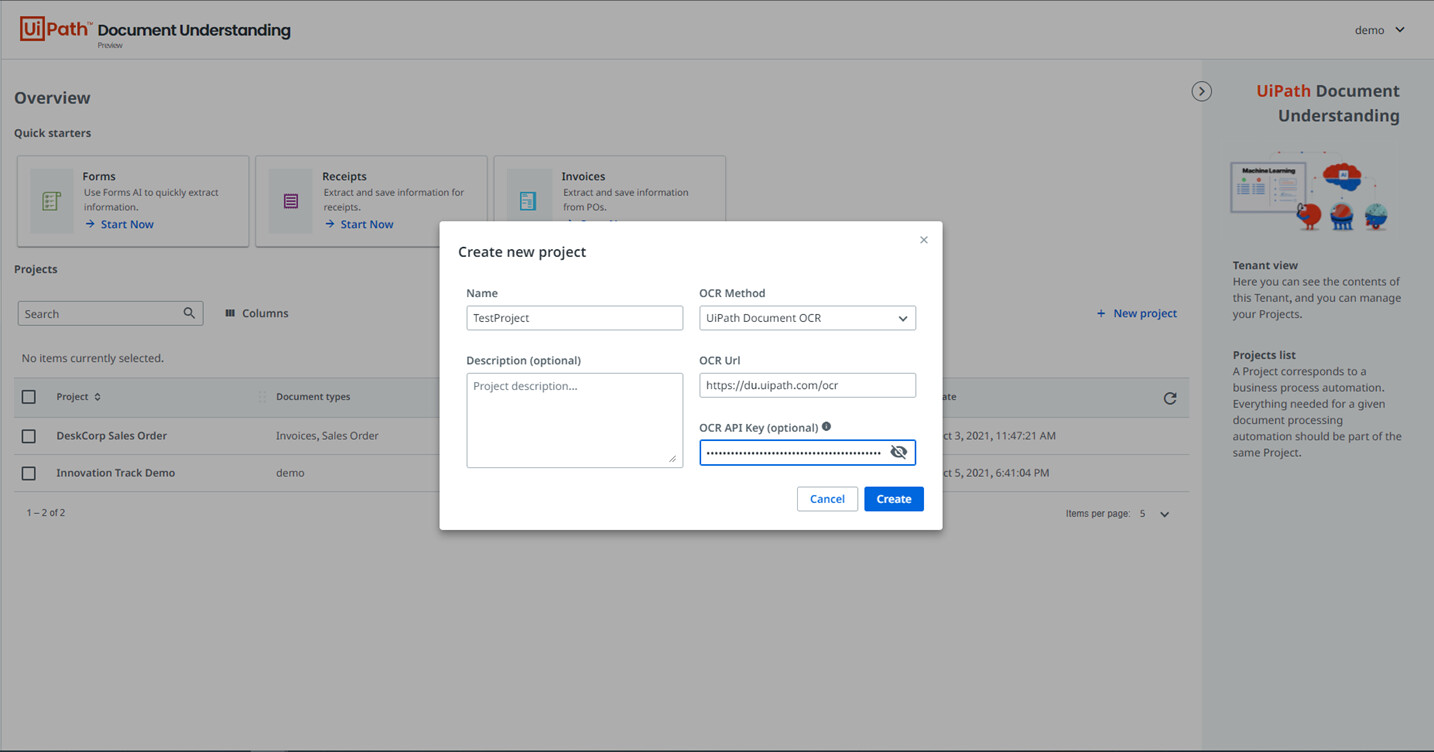
Step 2 - Click on “+ New project” to create a Document Understanding project. You need to enter the project name. If using UiPath Document OCR, no need to make any other changes. If you plan to use other OCR engines, you need to provide the URL and the API Key of those OCR engines.
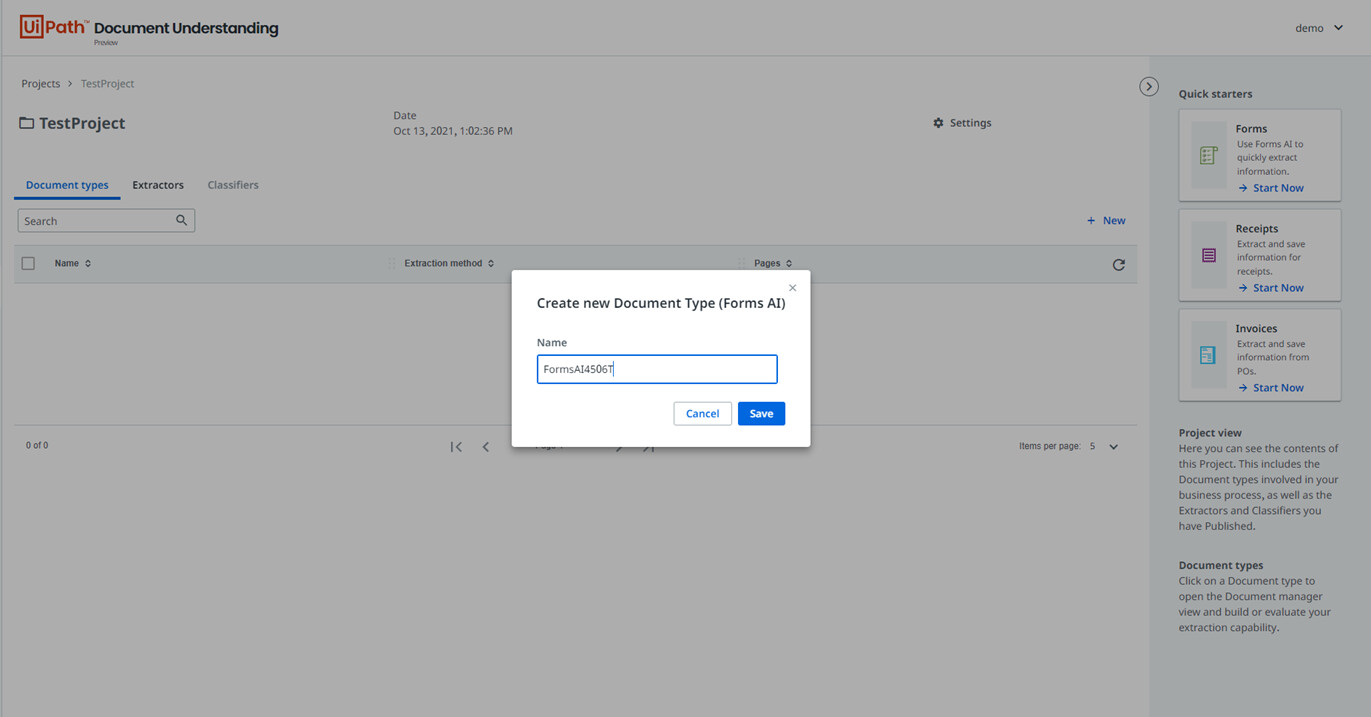
Step 3 - Once the project is created, click on the project. This will open a view like this:

Step 4 - You can now create a Forms AI session by either clicking “+ New” or accessing it from the quick starters panel on the right-hand side.

Step 5 - On the next screen, provide a session name
Step 6 - Once you hit “save”, the next screen will start the core of Forms AI experience. The first step is document upload. You need to upload 2-5 documents of the same layout to create a model. You can upload a maximum of 20 documents. Each document cannot have more than 5 pages.
Step 7 - When the document upload is done, hit “Next” and you will be taken to a screen that will show you the uploaded documents. You will notice that some fields have already been detected and are already labelled for you, like the name and the social security number.

- If you want to add more fields, simply click on “+ Add field”, provide a unique field name and hit “OK”


- To assign a value to the newly added field, simply select the value on the screen and hit the shortcut key to assign the value to this new field.
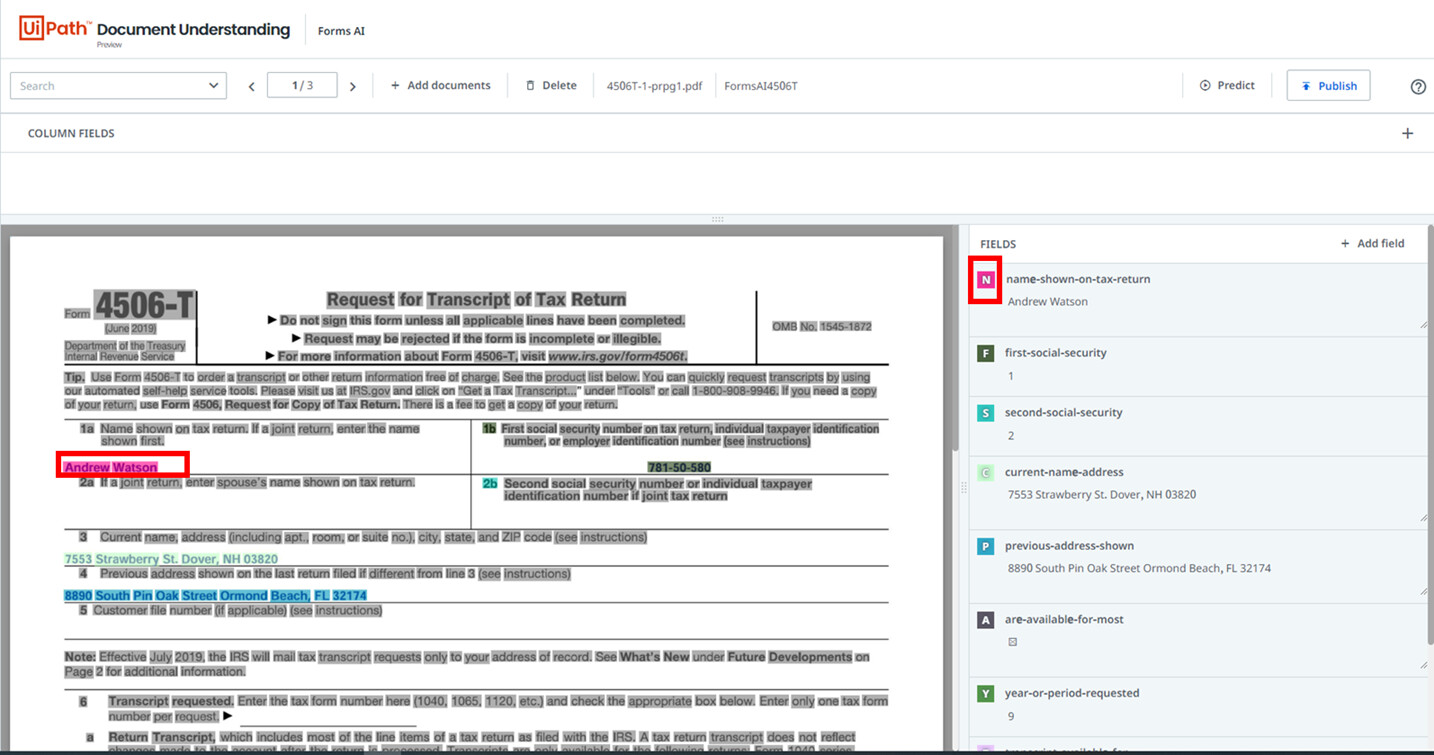
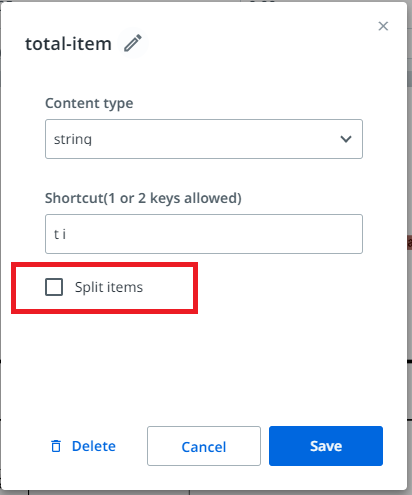
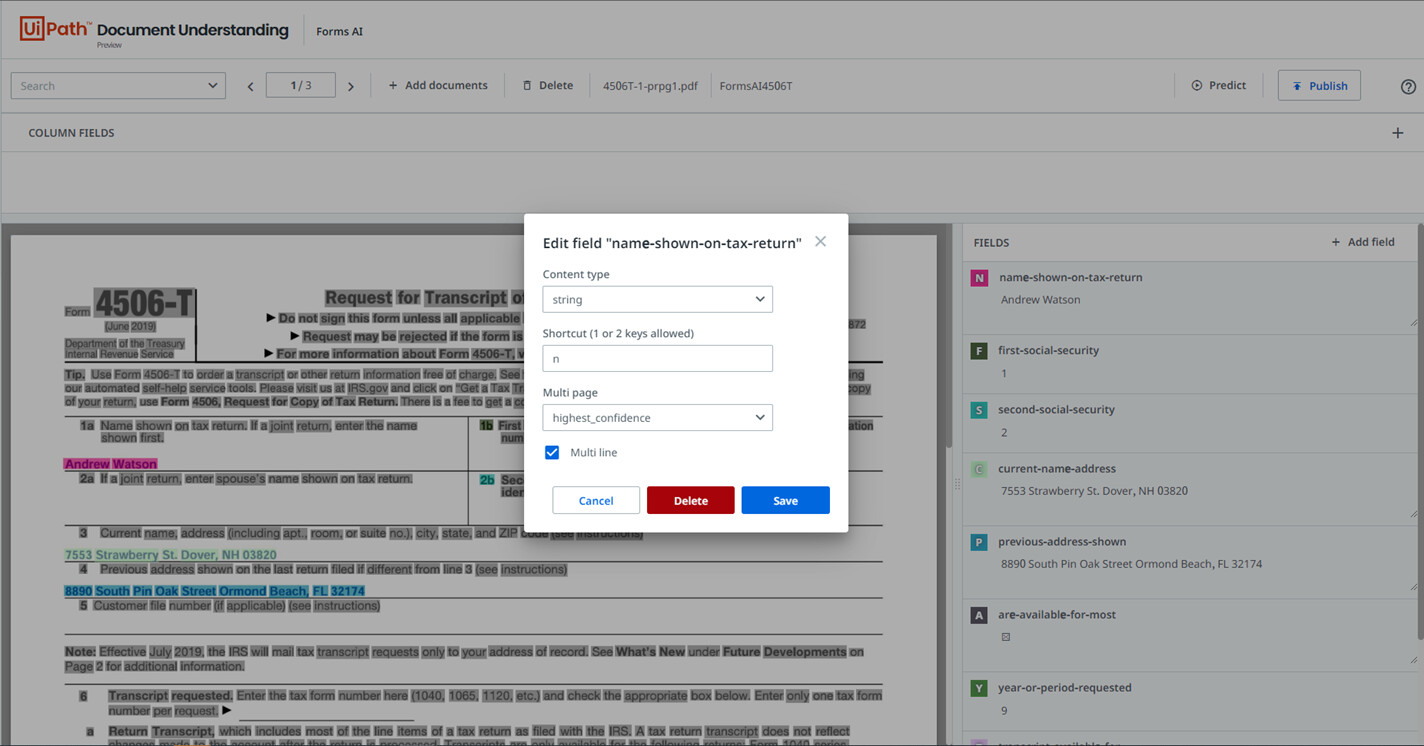
- If you want to edit a field or delete it, hover over the field and an edit button will appear on the top right side. Click on it and a pop-up will open to modify the field. “Multi line” option is for fields like addresses where the text may be on more than one line of text.
Also, the column fields have the very important option “Split items”. This option is to determine how the rows (line items) of a table are split up. If you mark a field as “Split items” then every value of that field will be placed on a different row.
- When you are satisfied with your field selection, go to the next document by clicking the arrow navigator on the top . All the changes are auto-saved as you make them

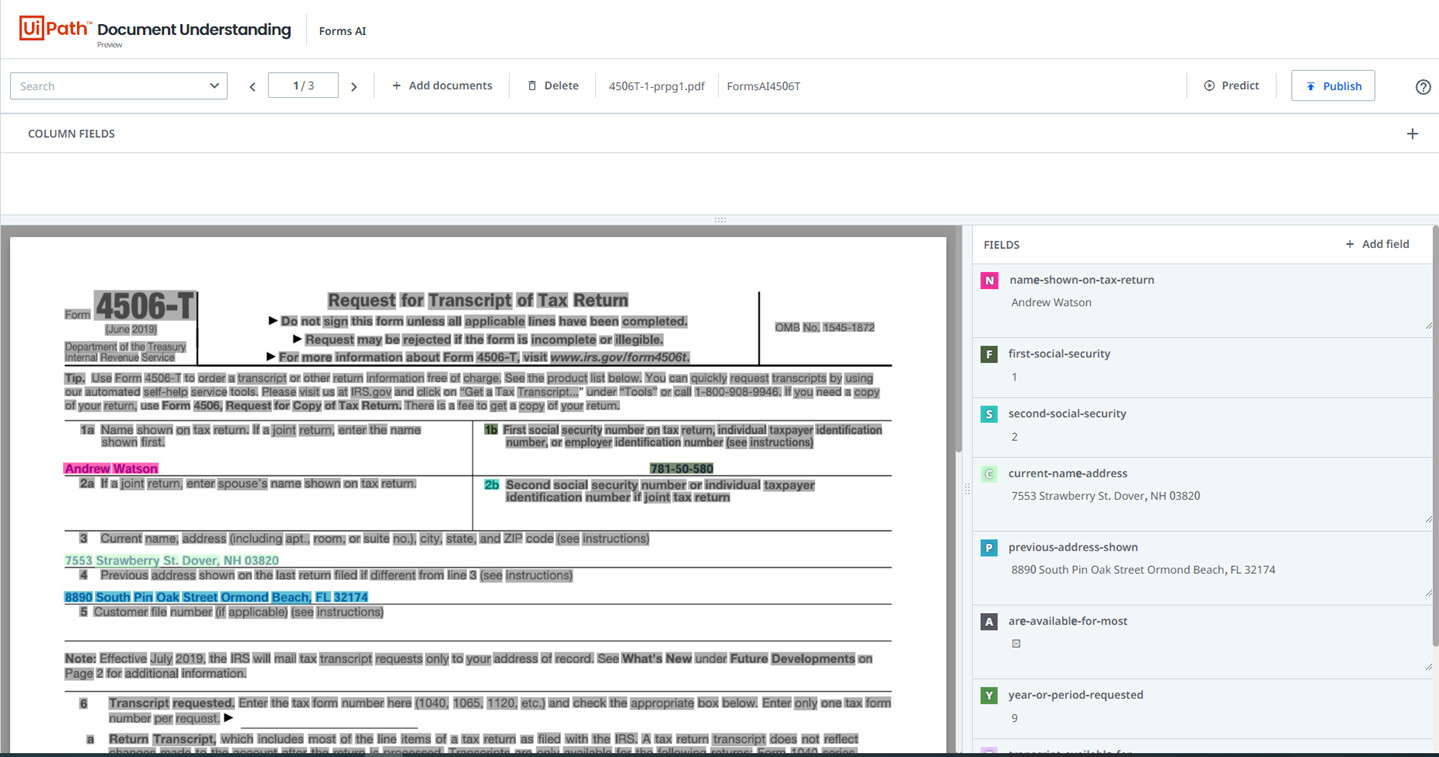
- While you navigate to the second document, Forms AI trains a custom ML model for you in the background. When you hit “Predict” on the second document, the predictions are generated using the trained and customized model. If the model misses something, you can make corrections and the model learns from it and customizes itself. You can now go through a few more documents and run predictions on them to test and refine the Forms AI model
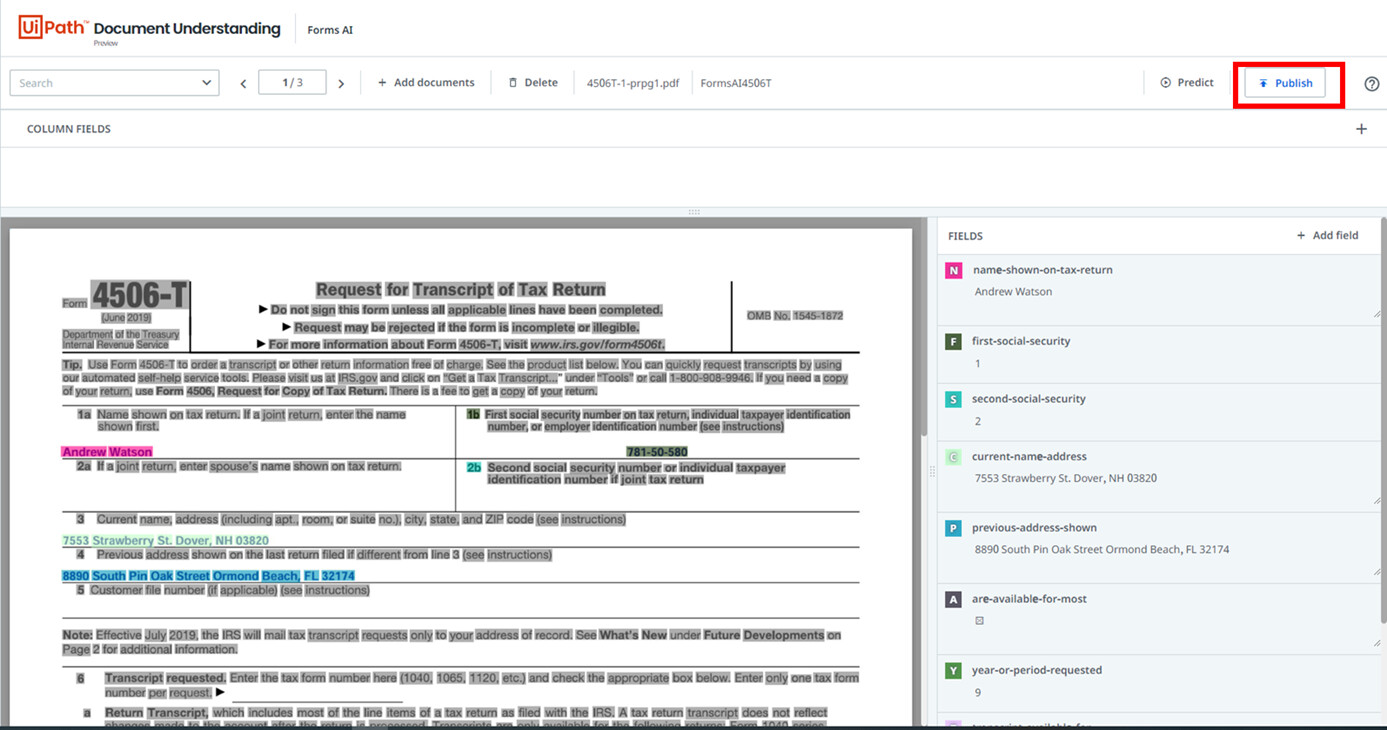
Step 8 - Now you are the third and final step for Forms AI
- When you feel the model is ready for your task, simply hit “Publish” and then provide an extractor name to create a custom endpoint for the model
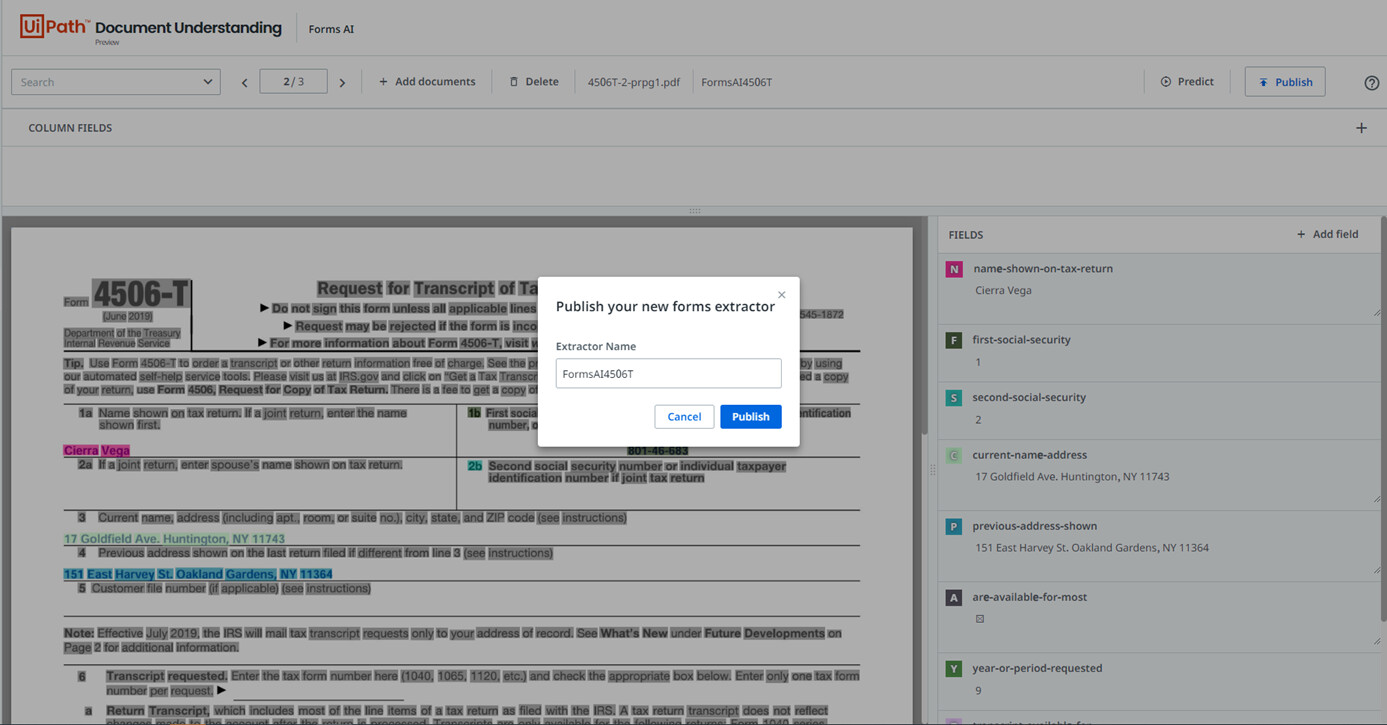
- Once you hit “publish”, the Forms AI interface will provide the option to “Copy Endpoint”

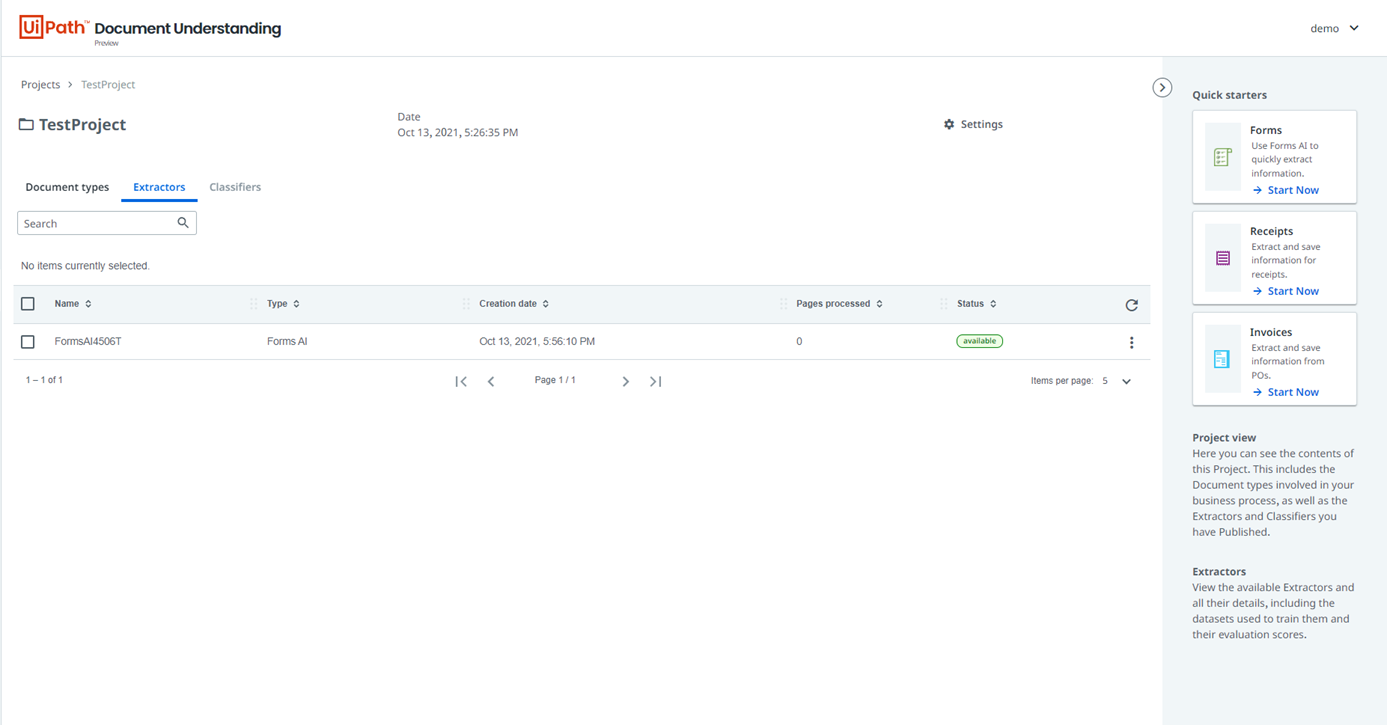
- You can verify the status of created model by simply going to the “Extractors” tab under the Forms AI session you created in your project
Step 9 - The endpoint created can now be used in ML extractor in your automation workflow for use as described earlier. You can also access the model endpoint created earlier by clicking on the three dots and copying the URL

You are done!! ![]()
![]()
If you run into difficulties, please respond to this post and let us know. We are working hard to make Forms AI more powerful and more easy to use every day.
Happy automating!
Your friendly Document Understanding team.