- Create a new project from the studio or use an existing project from any version control. In my case, I am using GitHub.
- In my project, I have one “main.xaml“ file along with two test cases.

- If you are creating a new project from the studio. Kindly please connect the project to the version control and push the code to it.

- After performing the above steps. My project is connected to Github.
Let’s start the configuration in Azure DevOps. - Kindly create an account at https://dev.azure.com/.
- Once the account is ready. The home page looks like below.

Prerequisites
• Enable the “Uipath integration” extension.
• Npm should be installed.
• Activate the agent.
Enable the “UiPath Integration” extension
• Click on “Organization settings” on the Azure DevOps home screen.
![]()
• Click on the “Extensions” options from the left side of the menu.
![]()
• Click on “Browse Market Place” from the right side of the panel.

• Search with the “UiPath” keyword you will get two products UiPath integration, UiPath test manager
• Install “UiPath integration extension”.
• After installation, you can able to see “UiPath integration extension” in installed tabs.

Npm installation
• Kindly download the latest version of the node setup based on your operating system.
• After the installation. Kindly verify whether npm is installed or not by using the following command.

• If it displays the version number your installation is successful.
Activate the agent
• Click on “Organization settings” on the Azure DevOps home screen.
![]()
• Click on “Agent pools” from the left-hand side menu.
![]()
• It will show two options on the right side “Azure Pipelines”,” Default”.
• Kindly select the Default option.
• Click on the “New Agent” button
![]()
• Another window will pop up. Kindly please select the respective operating system.
• Download the agent by clicking on the download button.
• Perform the steps as mentioned in the popup.

• After performing the above steps. It will ask a set of questions.
• Server url: https://dev.azure.com/XXXXXXXXXX(Example)
• Enter authentication type (press enter for PAT) → Get PAT from Azure DevOps home screen → Click on user settings icons → click on option “Personal access token”.
• Click on create a new token option-> Provide some name to and choose full access as the scope-> Hit on create button.
• Make note of the PAT key.
• Kindly provide PAT key in the power shell and hit enter.

• We are creating an agent in the default pool. So, No need to provide any name just hit enter.
• It will ask “Agent name”. Just hit enter. So, It will create an agent name with your system name.
• It will ask “Work folder” path. I am hitting enter. So, the project files will save in “C:\agent_work” by default.
• Choose “n” for the next two.
• Kindly execute the “.\run” command
• Finally, your agent is ready to execute the jobs and pipelines. To verify whether the agent is online or offline. Kindly please navigate to agent pools → Default. There you can see the status of your agent.

- Click on the new project button. Kindly please provide the azure project name and choose either private or public. In my scenario, I have chosen public.
- You can see projects in the projects tab.
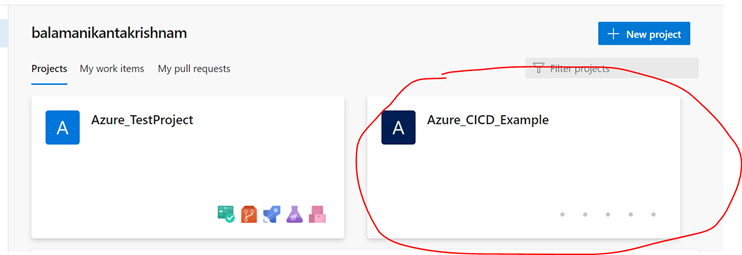
-
Click on the newly created project. In my scenario, I am clicking “Azure_CICD_Example”.
-
Once you navigated to the newly created project. We have to configure the orchestrator connection with Azure DevOps.
-
You can find the “Project Settings” option at the bottom left

-
Click on “Project settings” → “Service Connections” → “New service connection” → Type “Uipath” → Select “Uipath Orchestrator Connection”.
-
Click on “Next”.
-
You can see 3 options to configure orchestrator connection.” Basic Authentication”, “Token-based Authentication”, “ External Application”.
-
In my scenario, I have chosen “Token-based Authentication”.
-
To get that information. Kindly open “community version orchestrator” → Click on “More” → select “Admin” → Select “Tenants” option-> Choose which tenant you should have to create a project → Expand the tenant. In my scenario, my tenant name is “Expleo Solutions” → Select more options at orchestrator → Click on “API Access”.

- A window gets pop up. It has all the information regarding token-based authentication.

- Orchestrator URL, Account logical name, API key(User Key),Tenant(Tenant name), Service connection name(You can provide any name ).
- Select the “Grant access permission to all pipelines” checkbox.
- Once you have done. It will show as below. In my scenario, I have given the service connection name “UiPath_Testing”.

- Click on the new pipeline → Select GitHub option.

- Kindly please provide your GitHub credentials to access GitHub and select the project which you have pushed.
- Select Starter.yaml option.
- It will automatically create a Yaml file.
- In that kindly change pool to default. Because our agent is located at “Default”.

- Next, let’s add the UiPath Pack task to the YAML file. To do that, click on Show assistant and search for UiPath Pack. Choose your personal preference for the Versioning Method and Trace Level. Then, select the Service Connection in the Orchestrator Connection dropdown. Under Project(s) Path, type $(Build.SourcesDirectory). Finally, under Output Path, type $(Build.ArtifactStagingDirectory)\Output

-
Next, let’s add the UiPath. Test task to execute an existing test set in Orchestrator. Similar to adding UiPath Pack task, you can search for the UiPath Test task in Show Assistant. There are two test execution methods. The Execute test set method will run a preexisting test set in Orchestrator, while the Execute tests in project method will run tests in the transient project. If you select the Execute test set method, you need to create a test set in Orchestrator first, then provide the test set name in the Test set field.
-
In my scenario, we will choose the Execute tests in project method. Specify your service connection and Orchestrator folder, then click on Add.
-
Finally, search for Publish Build Artifact task in Show Assistant, give the Artifact a name, then click on Add. Congrats, you completed the build pipeline for your automation project. Proceed with saving the YAML file. You can run the pipeline to verify the result.


Step 7: Create a Release pipeline
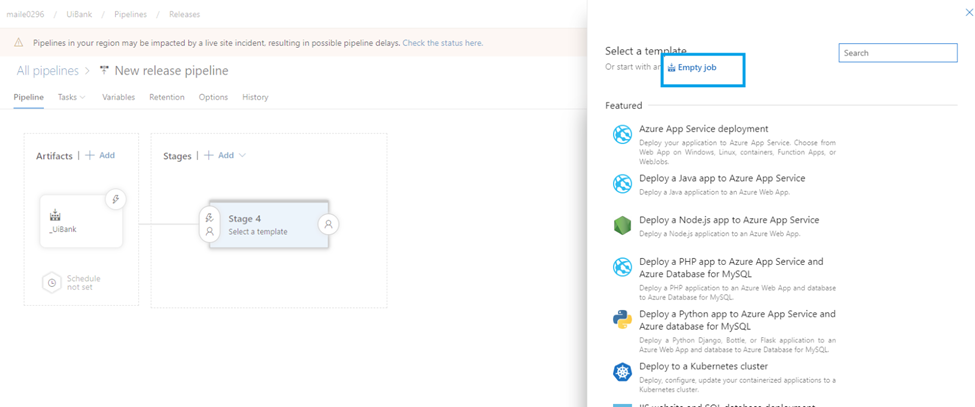
Finally, you will learn how to create a release pipeline for your automation process. At this stage, your automation process will be deployed to a production environment. First, go to the Releases tab under the Pipeline section and select New pipeline. It will ask you to select a template. You can close it for now.

Click on the Add an artifact block, select the Source Type as Build, choose the project and the build pipeline that we configured in the previous step, and click Add.


Then, move on to the Stages block and click on Add a Stage → select Empty job → click on 1 job, 0 task link.


You will see Agent job under the Tasks tab. Click on it to open the Agent job page. On the Agent job page, under the Demands section, add “npm”. Next, click on the “+” icon next to Agent job to add a new task to the agent job.

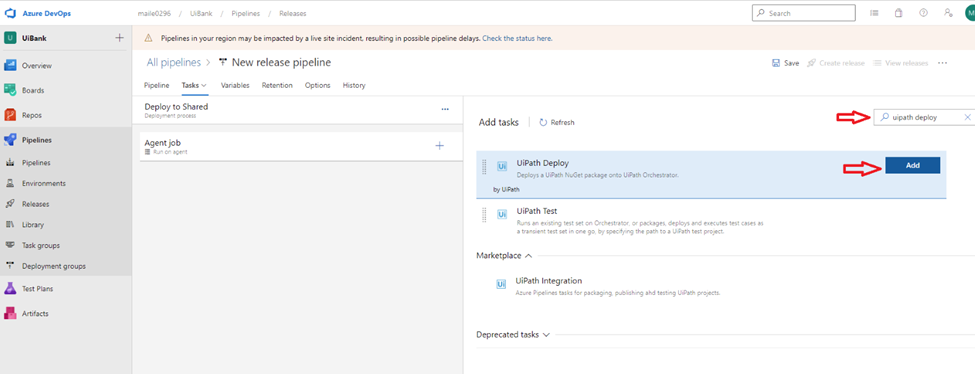
Search for “UiPath Deploy” here, add it, and configure the Orchestrator connection, Orchestrator folder. Click on “…” to browse the package path and point it to the Output directory of your folder. Click on Save.


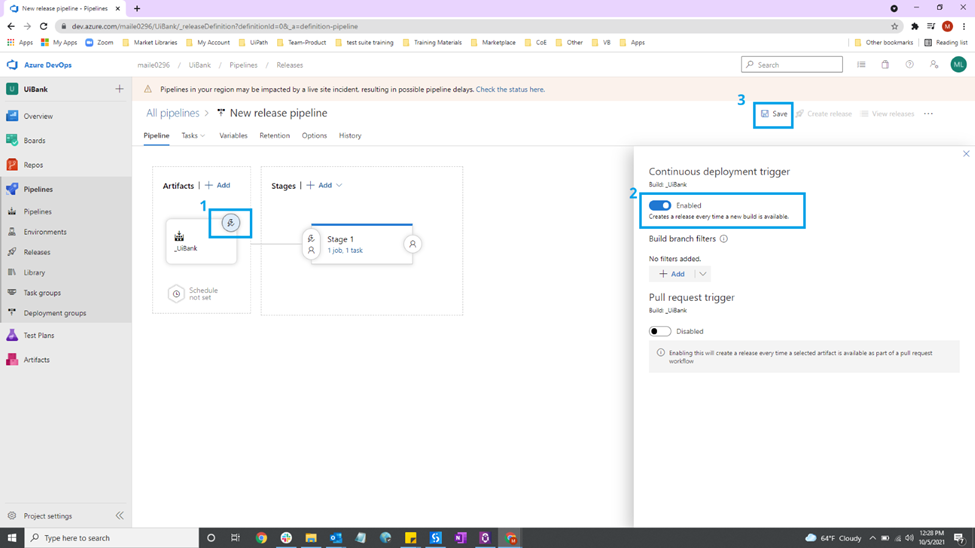
Then, go to the Pipeline tab, click on the lightning icon under Artifacts, and enable the Continuous Deployment trigger and save it again. This meant that whenever a build was created a release pipeline would be triggered. After that, click on Save to save all changes.
Finally, click on the Create Release button right next to the Save button. Select the stage you just created in the previous steps, and click Create.

Congratulations! You have both the build pipeline and release pipeline built now. To test whether the pipeline works, you can commit a code change in your automation process.
Then, you should be able to see the build pipeline is triggered, which will pack the automation process into a NuGet package and execute the test cases in Orchestrator. After the build pipeline runs successfully, the release pipeline will be triggered spontaneously to deploy the automation process to the destined folder in Orchestrator.


