The new Document Understanding Cross Platform created for use in Studio Web and also available in Studio Desktop simplify a huge amount of work we need to do with in a Document Understanding project and also give us easier objects to work with as outputs and are well worth using over the legacy versions, however it is currently missing a key feature, the training loop to retrain your Machine Learning Model.
In collaboration with UiPath we have figured out a workaround for this by leveraging the ‘classic’ Training Scope from the Windows activities, it does require some advanced knowledge for the setup though so I will explain that here.
Firstly lets briefly discuss the new Cross Platform Activities. This assumes you have a project set up in the Document Understanding Center and have deployed a ML model based on it. You can skip this if you are already confident you understand these activities and want to get to the training loop.
To add the new cross platform activities to your project use the dependency ‘UiPath.DocumentUnderstanding.Activities’
The first activity is the ‘Extract Document Data’ activity which will handle the taxonomy and digitization of the document you give it, its based on a document type you have previously defined in the Document Understanding Center.

The output type will change based on the document you select. For example for a Purchase Order it would be an IDocumentData<PurchaseOrder> for a Bill Of Lading it would be IDocumentData<BillOfLading>.
This object contains properties for all the data points in your document, which makes it much easier to use. Make sure you assign your variable for the output using ctl+k AFTER you select your ML Skill, otherwise you get the default, generic type which is much harder to use since all the properties from your document cannot easily be found.
Here you can see an example where all the fields in the document can easily be accessed.

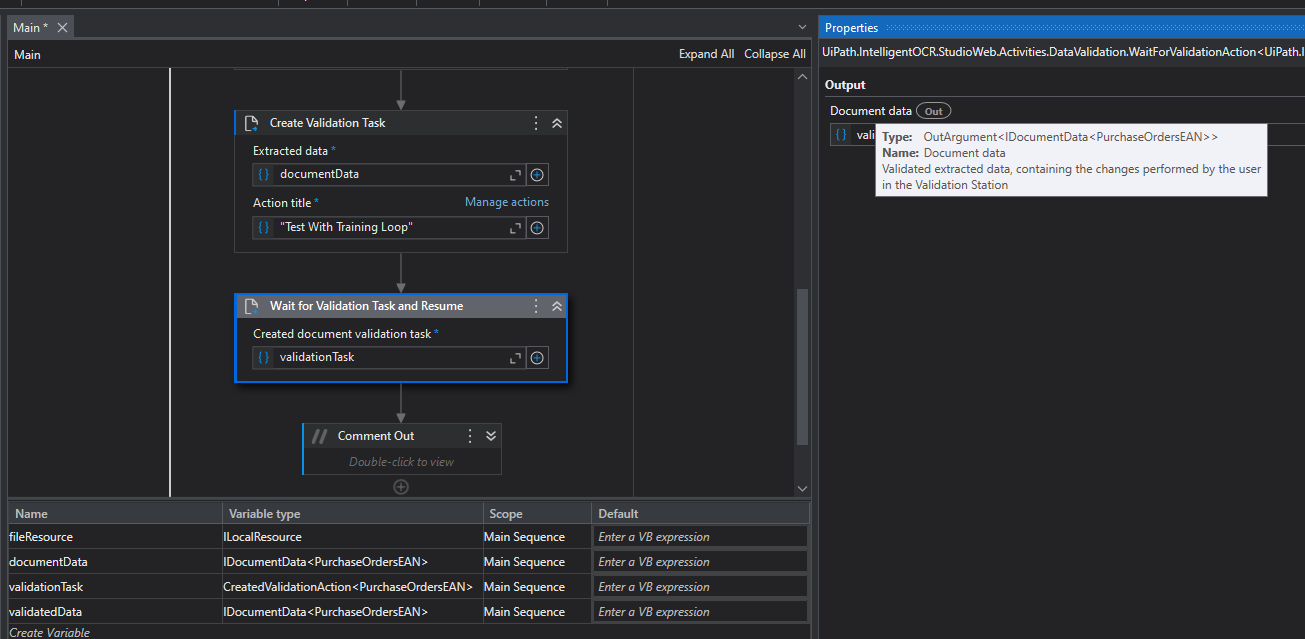
We then provide this input to a ‘Create Validation Task’ which creates the action in the action center. The output of this will also be dynamic based on the IDocumentData<T> that we give it. Pay attention to the folder and the Storage Bucket used in this activity as we need data from it later.
We then need to wait for the human so we use the ‘Wait for validation Task and Resume’. The job will suspend and wait for the human to validate the data.
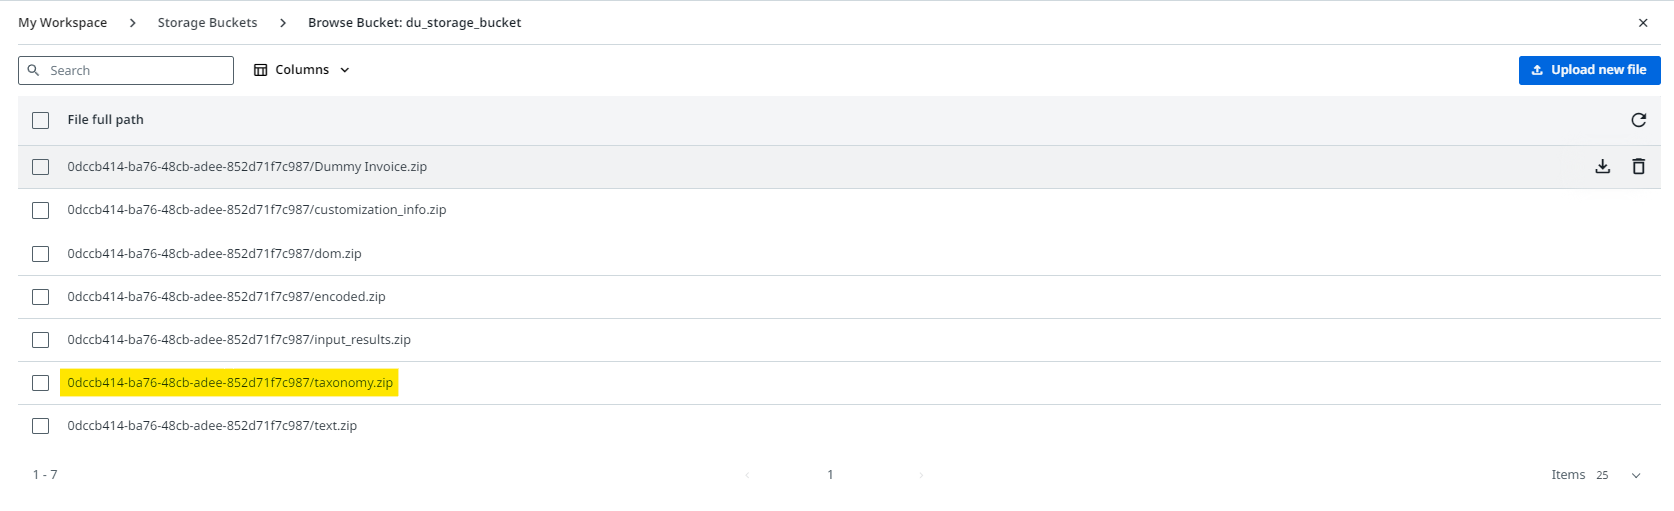
Leave a task in the action center to be validated and go to the storage bucket associated with the validation task, you should see various documents associated with the extraction there which have been handled for you automatically.
We need the Taxonomy for the ‘classic’ activities so download it.
The Training Loop activities need to be in a different UiPath project than the one containing the Cross Platform activities ones due to compatibility issues so we need to add to transfer data via a queue item, so lets add an item to a queue after we get back the human validated data in the first project.
We need the following Keys on the queue item specific content, this assumes the output from the Wait For Validation Task and Resume’ outputs to a variable called ‘validatedData’.
We must serialize some of the data to a string so it can be added to the queue.

| Key | Data Type | Value |
|---|---|---|
| Document Path | string | |
| Document Text | string | validatedData.DocumentMetadata.Text |
| Document DOM | string | Newtonsoft.Json.JsonConvert.SerializeObject(validatedData.DocumentMetadata.DocumentObjectModel) |
| Human Validated Data | sting | Newtonsoft.Json.JsonConvert.SerializeObject(validatedData.Data.GetProperties().GetExtractionResult()) |
In another project we can read the queue item and process that into a training dataset so lets start a new project.
We need the dependences ‘UiPath.DocumentUnderstanding.ML.Activities’ and ‘UiPath.IntelligentOCR.Activities’ in this second project to build the training loop.
The classic activities require you to build the taxonomy manually so we need the taxonomy that was generated for us from before that we downloaded (to save us making it manualy), add a folder to the UiPath Project called ‘DocumentProcessing’ and add the Taxonomy you downloaded there validate it works by opening it via the taxonomy manager in the project.


Assuming we set up the queue item as indicated earlier, we want to read these keys from it and assign the values we added to the specific content to variables so we can use them in the training activities.

| Variable Name | Data Type | Express to Get From Queue Item |
|---|---|---|
| documentPath | string | queueItem.SpecificContent(“Document Path”).ToString() |
| documentText | string | queueItem.SpecificContent(“Document Text”).ToString() |
| documentDOM | UiPath.DocumentProcessing.Contracts.Dom.Document | Newtonsoft.Json.JsonConvert.DeserializeObject(of UiPath.DocumentProcessing.Contracts.Dom.Document)(queueItem.SpecificContent(“Document DOM”).ToString()) |
| humanValidatedData | UiPath.DocumentProcessing.Contracts.Results.ExtractionResult | Newtonsoft.Json.JsonConvert.DeserializeObject(of UiPath.DocumentProcessing.Contracts.Results.ExtractionResult)(queueItem.SpecificContent(“Human Validated Data”).ToString()) |
Now add a ‘Training Scope’ activity and add the variables above to it.
We lastly need a ‘Machine Learning Extractor’ to add to the scope that we can configure.
Make sure you add all the fields from the Taxonomy to the extractor.
Set the output you want the data to be sent to, either a local folder, data set in the AI center or public endpoint.


From there we are done, you can run your two projects and validate they work! Be sure to check you get output as expected, if you do not there could be a mismatch in your taxonomy the document type ID is important as if they dont match they wont generate any training data.

