In Nov 2022, we announced the availability of APIs to programmatically interact with every component within AI Center. You can now manage datasets, train ML models, and deploy ML Skills, all without having to use the UI.
One of the key use-cases for leveraging APIs would be to manage the deployment status of an ML Skill. Depending on the automation, you might not require an ML Skill to be deployed and running all the time. Undeploying ML Skills when not in use could help you save on hardware costs (AI units). In this post, we walk you through an example workflow on how this can be done.
Here are the steps to accessing AI Center APIs. The first two steps enforce access control by making sure your application is registered and authenticated.
- Registering an external application (one-time setup)
- Generating an authentication token (renew upon expiry)
- Making AI Center API calls
Registering an external application
To use these APIs, your app will need to register as an external application with an AI Center scope.
-
Using the left navigation panel, go to the ‘
Admin’ page and select ‘External Applications’. -
To add a new external application, click ‘
+ Add Application’ and give it a name. Onlyconfidential applicationtype can access AI Center APIs -
To enable AI Center scope to the external application, click ‘
Add scope’, pickAI Center API Access (preview)from the Resource dropdown, navigate to theApplication Scopetab, and select the APIs to which you want to enable access to. Here I’ve selected all APIs for simplicity, but you can choose to assign specific APIs access to specific external applications.
-
Once you click ‘
Add’, a pop up with App ID and an App Secret is generated. You can view the App ID and App Secret anytime from the ‘Edit External application’. These credentials will be used to generate an authentication token in the next step.


Additional information on managing external applications can be found here
Generating an authentication token
For authentication and secure access, the external application must request an access token from the UiPath identity server. The generated auth token expires in one hour, upon which you will need to regenerate a new auth token.
For simplicity, I’ll use Postman in this tutorial. You can register for free, and use their web interface or application. Feel free to use any other tool that you are comfortable with.
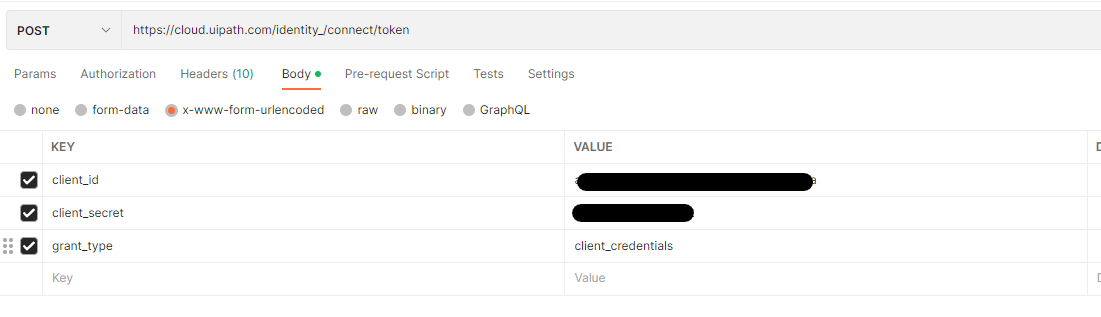
Generate a POST request to the Identity Server endpoint https://cloud.uipath.com/identity_/connect/token that includes the following in the body of the request. Set grant_type to “client_credentials”
client_id: App ID from previous step
client_secret: App Secret from previous step
grant_type: “client_credentials”
If you’re using Postman, make sure you use the content type application/x-www-form-urlencoded.
This request would generate an auth token similar to the one below, also listing the permissions enabled for this external application. We will use this auth token when making AI Center API calls.

Additional information on credentials and auth tokens can be found here.
Making AI Center API calls
The API calls adhere to the following structure https://cloud.uipath.com/accountname/tenantname/aifabric_/ where “accountname" and “tenantname” are specific to your account. Most APIs will need the following information
-
Account ID and Tenant ID: The account and tenant information can be found in the profile info section within the tenant. Read more about it here
-
Authorization: The authorization field should be populated with the auth token generated in the previous step. When using the auth token, prefix it with ‘Bearer ’ as seen in the screenshot below.

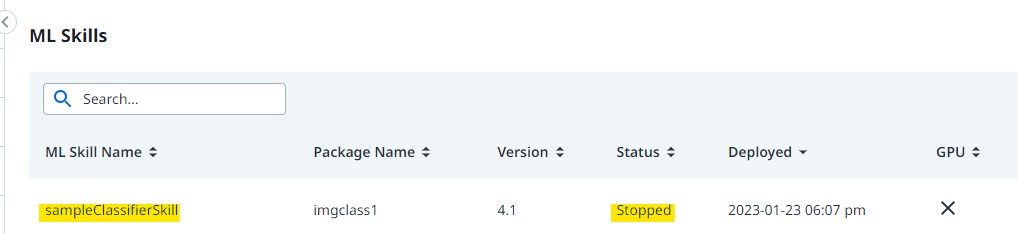
Now we’re ready to access specific APIs. Let’s use sampleClassifierSkill throughout this example. From the UI, you can see this skill exists and is currently in the Available state.

We would be using AI Center APIs to do the following -
- Find the ML Skill ID of
sampleClassifierSkill - Stop (undeploy) the ML Skill
- Start (redeploy) and verify status update.
Find ML Skill details
Using the GET ML Skills call, you can fetch a list of all ML Skills within the account and tenant. You can also add the ML Skill name as part of the query to search for a specific ML Skill and retrieve its details. In this case, we find the ML Skill idfor the sampleClassifierSkill
GET /ai-deployer/v1/mlskills?name=sampleClassifierSkill

In the response below, the key fields are highlighted in yellow. We double check that the sampleClassifierSkill is in the Available state. The ML Skill id will be used in the subsequent APIs to update the state.

Stop ML Skill
To stop an ML Skill
- Request query should contain update action (‘stop’) and ML Skill
id - Header should contain account, tenant and auth info
PUT /ai-deployer/v2/mlskills/stop/{mlSkillId}

The response shows the ML skill status change was successful.

Checking the UI, you can verify that sampleClassifierSkill has been undeployed.
Resume ML Skill
To restart the ML Skill (deploy), we make the API calls with the updateType set to Resume
POST /ai-deployer/v1/mlskills/{mlSkillId}?updateType=RESUME

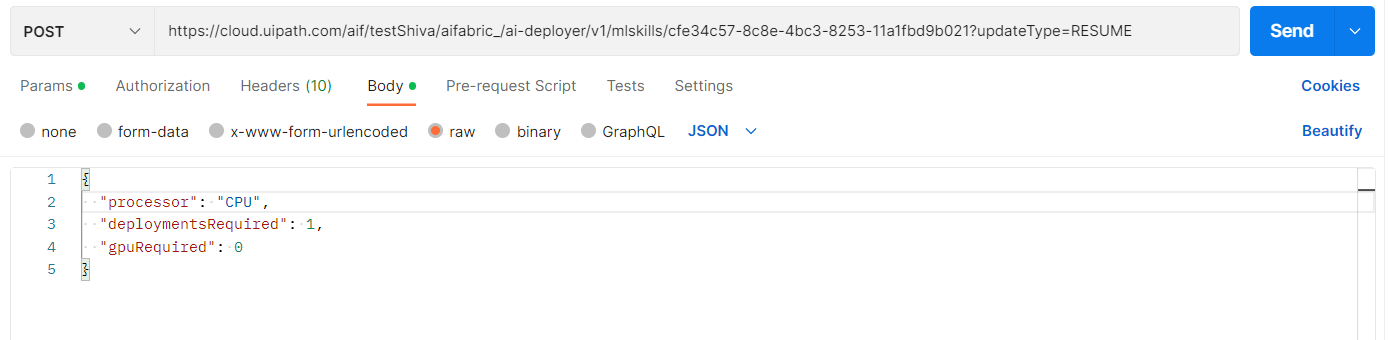
From the response, we see that the request was successful, and the skill state has been updated to ‘Deploying’

Now you can wait for the Skill to become available, and check ML Skill status using the GET ML Skill details API.

From the response, the ML Skill is now deployed and Available! You can also verify the skill availability in the UI. Now your automations can leverage the deployed ML Skill sampleClassifierSkill within workflows to make predictions.


With these API requests, you can programmatically change the state of an ML Skill. These APIs could be used even within an automation workflow to deploy and undeploy an MLSkill, optimizing the uptime for infrastructure and saving costs. While this is just an example, the complete set of AI Center APIs are documented in swagger
https://cloud.uipath.com/accountname/tenantname/aifabric_/ai-helper/swagger-ui/index.html
where “accountname" and “tenantname” are again specific to your account.
We hope this helps you get started using AI Center APIs, and we look forward to your feedback.

