Representational State Transfer (REST) is a set of guidelines for stateless Web APIs. It bases on HTTP methods to access resources via URL encoded parameters and the use of JSON or XML to transmit data. REST is a communication standard. There are a lot of REST APIs available. During the development of automation workflows it may be, that necessary Web APIs are not yet available or restricted or may not be accessed due to restrictions. So it can be helpful to have a local realization of a web service. In this guide I will describe how to realize a local REST environment easily.
First step is to download all necessary programs:
- UiPath Studio
- Demo version of Quick ‘n Easy Web Server, a very easy configurable web server, as an alternative for Microsoft’s IIS, with ASP support. The "little brother" I presented here.
- PHP (Hypertext Preprocessor) a scripting language that is especially suited to web development. Download here the ZIP file of non thread safe version - VS16 x64 Non Thread Safe.
With this we have everything on board.
Installation and Configuration
In the second step it is necessary to unpack the Web Server and PHP into different directories. Now jump into your PHP directory and rename or copy the file php.ini-development to php.ini.
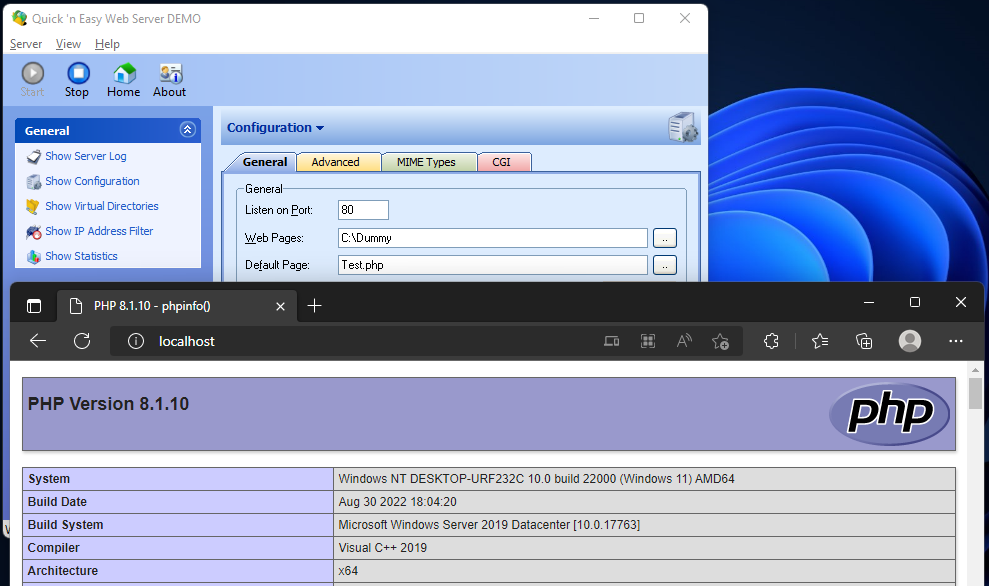
Jump into your Open Quick ´n Easy Web Server directory, start the quickweb.exe and add php-cgi.exe at the CGI configuration. You can find php-cgi.exe into your PHP directory.

With a tiny test script it is now possible to check the installation.
<?php
phpinfo();
?>
Save this script as test.php and switch to General tab and add the test script as default page.

Start or restart your Web Server.

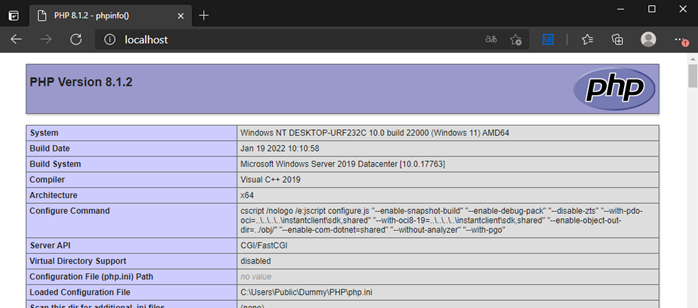
Open now the browser and type localhost in the address bar and press enter. You should see now all PHP information.
All preparations are done so far and with that we have the basis to create a web service in PHP and use it with UiPath.
The Web Service with PHP
The first example simply exports a string.
<?php
//-Begin--------------------------------------------------------------

echo "Hello World from PHP " . phpversion();

//-End----------------------------------------------------------------
?>
Save this script in a file and rename the default page as I described above. Restart the server, by pressing Stop and Start. In Postman the call looks like this.

It is necessary to install the UiPath Web Activity first.

And in the HTTP Request Wizard, which you can find at App Integration > Web > HTTP Request, we get the same result …

… and also in the workflow.

So far so well, but Web Services are normally not so simple. Here an example with a parameter.
<?php
//-Begin--------------------------------------------------------------

if(isset($_GET['name'])) {
  $name = $_GET['name'];
  $result = "Hello " . $name . " from PHP";
  echo $result;
}

//-End----------------------------------------------------------------
?>
With the isset PHP command we determine if a variable is declared. You can find the detailed PHP documentation here. In this case the we add the parameter name …
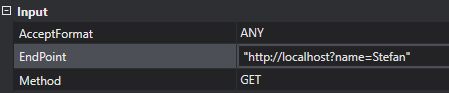
… and get the expected result.

That is one way to transfer data to the PHP script.
Transfer JSON Data
In this example we transfer and deliver the data in JSON format. To decode the incoming JSON data, via the body of the HTTP request, we use json_decode command. It transfers the JSON data into an PHP array. For outgoing data, we do just the opposite. A PHP array is transferred via json_encode command to JSON.
<?php
//-Begin--------------------------------------------------------------

$body = json_decode(file_get_contents('php://input'), true);
$name = $body["name"];

$result = array("result" => "Hello " . $name . " from PHP",);
echo json_encode($result);

//-End----------------------------------------------------------------
?>
The data are transfered via the Body of the HTTP request and it is necessary to set the BodyFormat property too.

And to get the data it is necessary to deserialize it.

Conclusion
As we can see, we can quickly build a local test environment for Web APIs with REST services using a few simple tools. With this approach, here via Quick 'n Easy Web Server and PHP, we have full flexibility to generate the data and states we need for development and testing with a REST service easily.